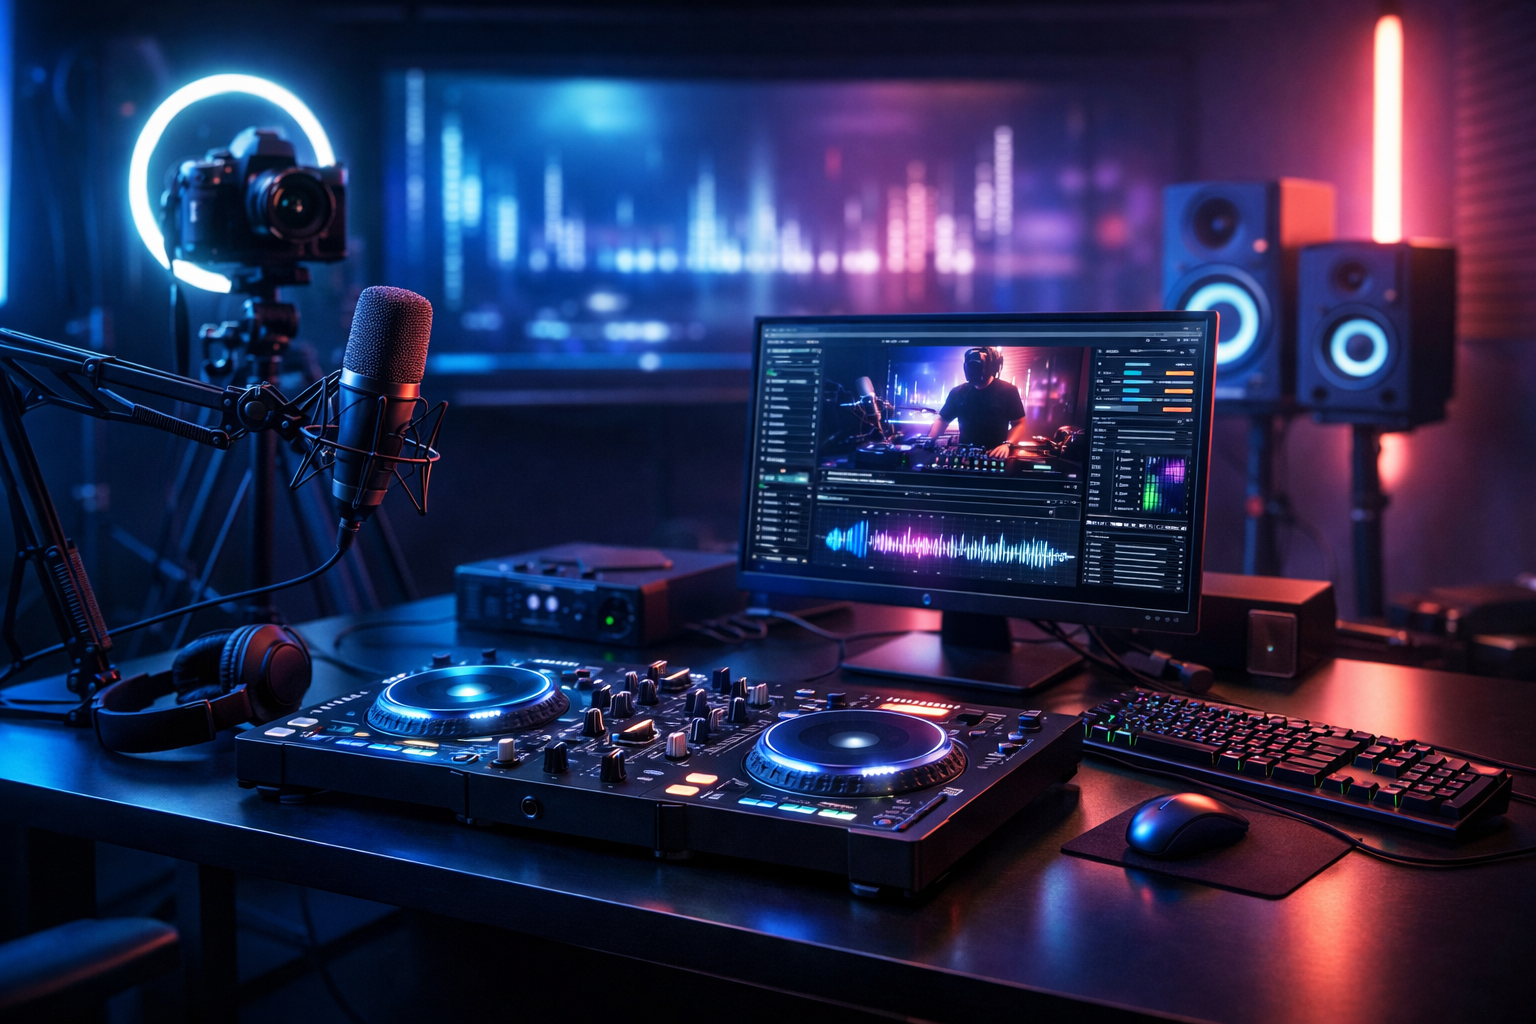
Stream DJ Sets Live to Twitch and Facebook Simultaneously (2026 How-To)
If you want to grow fast in 2026, don’t pick just one platform. This guide shows you how to run a stable, broadcast-quality DJ audio stream through Shoutcast Net and then Restream to Facebook, Twitch, YouTube (and more) at the same time—without juggling multiple encoders, and without the surprise costs that come with Wowza’s expensive per-hour/per-viewer billing.
The key idea: use Shoutcast Net as your always-on audio backbone (flat-rate, unlimited listeners, SSL streaming, 99.9% uptime), then feed that into your video destinations via a restream workflow. You’ll get a consistent audio URL you can embed anywhere, plus live video presence for discovery.
- Best for: radio DJs, music streamers, podcasters, church broadcasters, school radio stations, and live event streamers
- What you’ll achieve: one encoder → one reliable Shoutcast stream → simultaneous Twitch + Facebook Live (optionally YouTube too)
- Bonus: AutoDJ fallback so your station stays live when you’re off-air
What makes this setup different?
Instead of pushing separate streams to each platform (and risking dropouts), you’ll run one clean audio feed and reuse it everywhere—so you can stream from any device to any device while keeping control of quality and uptime.
Shoutcast Net also supports modern workflows and integrations across any stream protocols to any stream protocols (RTMP, RTSP, WebRTC, SRT, etc) via external tools—without being boxed into legacy Shoutcast limitations.
Table of contents
What you need before you go live
Before you stream a DJ set to Twitch and Facebook at the same time, decide what your “source of truth” is. In this tutorial, Shoutcast Net is your reliable audio hub (SSL, unlimited listeners, 99.9% uptime), while Twitch/Facebook handle discovery and chat.
1) Hardware checklist (minimum and recommended)
You can go live with a laptop and a controller, but stable audio depends on consistent input gain and clean routing.
| Item | Minimum | Recommended for pro sets |
|---|---|---|
| Computer | Modern laptop/desktop | Dedicated streaming PC or stable laptop + wired Ethernet |
| DJ gear | Controller (USB) | Mixer + decks/controller + balanced outputs |
| Audio interface | Optional | USB interface for clean line-in (prevents noisy capture) |
| Mic | Headset mic | Dynamic mic + interface (better voice clarity) |
| Internet | 10 Mbps up | Wired + 20 Mbps up (headroom for video + audio) |
2) Accounts and permissions
- Shoutcast Net account and server plan (start from $4/month)
- Twitch account (get your Stream Key from Creator Dashboard)
- Facebook Page or Profile with Live access (get Stream Key/Server URL in Live Producer)
- Optional: YouTube Live enabled (helpful if you also want “Restream to Facebook, Twitch, YouTube”)
3) Software you’ll use (simple stack)
There are many ways to do this, but the most reliable is: one encoder for audio → one encoder for video → restream to multiple platforms.
- Audio encoder: BUTT (Broadcast Using This Tool), Mixxx (broadcast), or VirtualDJ (broadcast)
- Video encoder: OBS Studio (captures your visuals and pulls in your audio)
- Restream option: a multi-RTMP approach (OBS plugin or a restream service). This allows any stream protocols to any stream protocols (RTMP, RTSP, WebRTC, SRT, etc) depending on your tools.
Pro Tip
If you’ve ever tried to stream separately to Twitch and Facebook, you’ve likely seen audio drift, double encoding, or random disconnects. Building around a single Shoutcast Net audio stream helps you keep a consistent, reusable station feed—without Wowza’s expensive per-hour/per-viewer billing and without being stuck in legacy Shoutcast limitations.
Create your Shoutcast Net server (7-day free trial)
First, create your streaming server at Shoutcast Net. This becomes your “broadcast transmitter” for audio, which you can embed on websites, apps, smart speakers, and players—while still streaming live video to social platforms.
Step 1: Start a server with the free trial
Open the free trial page and create your server in a few minutes.
- Go to 7 days trial and sign up
- Select a plan (you can start as low as $4/month after the trial)
- Choose region closest to your audience for lowest latency and best stability
Step 2: Confirm core stream settings
In your Shoutcast Net panel, note these essentials (you’ll paste them into your encoder):
- Server hostname/IP
- Port
- Password (broadcaster/source password)
- Mount / Stream ID (if applicable to your setup)
- Stream URL for sharing (and SSL link if provided)
Step 3: Set your station identity (metadata)
Metadata makes your stream look professional in players (DJ name, show title, “Now Playing”). This is especially important if you want listeners to move from Twitch/Facebook to your 24/7 station page.
- Station name (e.g., “Friday Night House Live”)
- Genre tags
- Public contact/website
- Artwork (where supported)
Pro Tip
Shoutcast Net is built for broadcasters who need unlimited listeners, predictable pricing, and reliability. That’s the opposite of platforms like Wowza, where costs can scale fast with per-hour/per-viewer billing—especially for long DJ sets, church events, or school broadcasts.
If you want to compare options, you can also view icecast offerings, but for many DJs and stations, Shoutcast Net’s dashboard simplicity and broadcast workflow is the fastest path to going live.
To pick your plan anytime, visit the shop or see details on shoutcast hosting.
Configure your encoder for a stable DJ audio stream
Now you’ll connect your DJ audio to Shoutcast Net using an encoder. The goal is a clean signal, stable bitrate, and settings that won’t collapse when your network fluctuates.
Step 1: Pick a bitrate that matches your upload and audience
For most DJs, 128 kbps AAC (or 128–192 kbps MP3) is a solid balance. If your audience is mobile-heavy, prioritize stability over pushing maximum bitrate.
| Use case | Codec | Bitrate | Why |
|---|---|---|---|
| General DJ set | AAC | 128 kbps | Great quality per kbps, stable for most connections |
| High-fidelity listening | MP3 | 192 kbps | More detail, needs more upload headroom |
| Speech/podcast/church | AAC | 64–96 kbps | Clear voice, lighter bandwidth |
Step 2: Route clean audio into the encoder
Avoid “what you hear” capture if possible. Use either an audio interface line-in, or virtual audio routing (e.g., VB-Audio Cable) from your DJ software into the encoder.
- Set your DJ software output to your interface (or virtual cable)
- Set the encoder input to that same interface/cable
- Do a quick gain check: peaks should not clip (stay below 0 dBFS)
Step 3: Fill in Shoutcast server details in your encoder
Below is a typical “source connection” layout. Your panel provides the exact host/port/password.
Encoder: BUTT / Mixxx / VirtualDJ (broadcast settings)

Server type: SHOUTcast
Address: your-server-hostname-or-ip
Port: 8000
Password: your-source-password
Codec: AAC (or MP3)
Bitrate: 128 kbps
Sample rate: 44.1 kHz
Channels: Stereo
Reconnect: Enabled (5s - 10s)
Metadata / Stream title: Enabled
Step 4: Add stability settings (the “no-dropout” basics)
Small changes can prevent a stream from falling over mid-set:
- Use wired Ethernet where possible (Wi‑Fi can spike and cause encoder disconnects)
- Enable auto-reconnect in the encoder
- Keep CPU headroom: close browsers and heavy apps during your set
- Lock sample rate (44.1 kHz is standard for music streaming)
- Use SSL streaming links when embedding/players require HTTPS
Pro Tip
If you’re used to older “legacy Shoutcast limitations” like fragile connections or awkward workflows, this is where Shoutcast Net shines: simple server details, stable delivery, SSL streaming, and a flat-rate model designed for long sessions and unlimited listeners—not a meter running like Wowza’s expensive per-hour/per-viewer billing.
Set up restreaming to Twitch and Facebook simultaneously
Next, you’ll send your live show to Twitch and Facebook at the same time. You have two common approaches in 2026: (1) OBS with a multi-stream method, or (2) a dedicated restream service. Either way, the logic is identical: one OBS output → multiple RTMP destinations.
Step 1: Build your OBS scene (video + your DJ audio)
Open OBS and create a scene that matches your show style (camera, deck cam, visualizer, or just cover art). Then make sure OBS is using the same audio feed you’re sending to Shoutcast.
- Add Video Capture Device for camera (optional)
- Add Window Capture for your DJ software (optional)
- Add Audio Input Capture and select your interface/virtual cable
- In OBS Audio Mixer, avoid red clipping; aim for peaks around -6 dB
This keeps your set consistent across platforms and makes it easier to stream from any device to any device because your audio backbone is stable and reusable.
Step 2: Choose a Twitch/Facebook output profile
For dual streaming, don’t max out your upload. Pick a safe video bitrate that leaves room for your Shoutcast audio encoder too.
| Platform | Resolution | FPS | Typical video bitrate |
|---|---|---|---|
| Twitch | 1080p | 30–60 | 4500–6000 kbps |
| Facebook Live | 720p–1080p | 30 | 3000–6000 kbps |
Step 3: Add two outputs (Twitch + Facebook) using a multi-destination method
You can accomplish simultaneous Twitch and Facebook streaming by using a restream service or an OBS multi-output workflow. The steps below are generic and apply to both approaches: you’ll enter each platform’s RTMP ingest URL and stream key.
Destination 1 (Twitch)
RTMP Server: rtmp://... (Twitch ingest URL)
Stream Key: live_...

Destination 2 (Facebook Live)
RTMP Server: rtmps://live-api-s.facebook.com:443/rtmp/ (example)
Stream Key: FB-...

OBS Output
Encoder: NVENC / x264
Rate control: CBR
Keyframe interval: 2 seconds
Audio bitrate: 160 kbps (OBS side)
Reconnect: Enabled
Important: Your Shoutcast stream and your OBS stream are two separate outputs. That’s okay: Shoutcast Net handles your audio broadcast for listeners everywhere, and OBS handles your video presence on social platforms.
Step 4: Keep latency predictable for chat interaction
If your setup supports it, enable low-latency mode on the platform and keep your pipeline simple. Many creators target very low latency 3 sec for interactive chat moments (song requests, shoutouts, live event cues). Your exact latency depends on platform settings, encoder, and network conditions.
Step 5: Why this approach beats expensive “pay-by-usage” stacks
Some broadcasters try to build this on top of usage-billed infrastructure. The problem is predictable: longer sets and bigger audiences cost more. With Shoutcast Net, your audio delivery is designed for broadcasters—flat-rate, unlimited listeners, SSL streaming, and reliable uptime—rather than Wowza’s expensive per-hour/per-viewer billing model.
Pro Tip
Want to promote one “official” link everywhere? Use your Shoutcast Net stream page/link as the consistent destination, then use Twitch/Facebook for discovery. That way, if one social platform throttles reach, your station still delivers to unlimited listeners without sudden cost spikes.
Enable AutoDJ as a failover when you’re off-air
Live DJ sets are fun—until your laptop reboots mid-show or your network drops. That’s where AutoDJ becomes essential. It keeps your station running 24/7 with scheduled playlists and can act as a failover when your live source disconnects.
Step 1: Activate AutoDJ in your Shoutcast Net plan
If your plan includes it, enable AutoDJ inside your Shoutcast Net control panel. If you need it, you can add it via AutoDJ.
Step 2: Upload your backup content
Add music, mixes, announcements, or sermon/podcast episodes that can play when you’re not live.
- Upload audio files to your media library
- Organize by folders/playlists (e.g., “Warmup,” “Top of hour IDs,” “Afterparty”)
- Confirm metadata (artist/title) to keep players clean
Step 3: Configure failover behavior
Set AutoDJ to take over when the live source disconnects. This is your “dead air insurance.” The listener experience stays seamless, especially for radio stations, churches, and school broadcasts.
- Failover on source disconnect: enabled
- Return to live when source reconnects: enabled (when supported)
- Station IDs: schedule IDs every 10–20 minutes if desired
Step 4: Use AutoDJ for pre-show and post-show
A simple professional flow:
- 30 minutes pre-show: AutoDJ warmup playlist
- Live set: your encoder takes over
- Post-show: AutoDJ chill playlist + promos + schedule announcement
Pro Tip
AutoDJ doesn’t just prevent silence—it helps you build a real station brand. Viewers might discover you on Twitch/Facebook, but listeners stay when you’re reliably on-air. That reliability is where Shoutcast Net’s 99.9% uptime and flat-rate model stand out compared with legacy Shoutcast limitations and usage-based systems.
Test, go live, and monitor quality (99.9% uptime tips)
Before you announce your set, run a short private test, verify audio on multiple devices, and confirm both Twitch and Facebook are receiving stable video. The goal is: clean audio, stable bitrate, correct metadata, and minimal interruptions.
Step 1: Do a 5-minute “full chain” test
Start your Shoutcast encoder first, then start OBS/restream. Monitor on at least two devices (phone + laptop). This confirms you can truly stream from any device to any device.
- Connect encoder to Shoutcast Net and play a track
- Confirm the Shoutcast stream loads externally (not just on your LAN)
- Start OBS and send to Twitch + Facebook simultaneously
- Listen for clipping, distortion, or “double audio”
Step 2: Verify you’re not double-processing audio
The most common mistake is routing the same audio twice into OBS (e.g., desktop audio + audio interface). In OBS:
- Disable “Desktop Audio” if you’re using a dedicated interface input
- Keep one primary music source and one microphone source
- Add a limiter if you tend to clip during transitions
Step 3: Check platform health + bitrate stability
Both Twitch and Facebook provide stream health indicators. Watch for dropped frames and bitrate fluctuations. If you see instability:
- Lower video bitrate by 10–20%
- Reduce resolution from 1080p to 720p
- Switch to wired Ethernet
- Stop cloud backups during your set (they can spike upload)
Step 4: Maintain listener continuity with Shoutcast Net
Even if a social platform hiccups, your Shoutcast stream remains your steady audio channel—built for broadcast with SSL streaming, unlimited listeners, and 99.9% uptime. This is a major reason DJs and stations use Shoutcast Net rather than workflows tied to usage billing like Wowza’s expensive per-hour/per-viewer billing.
Step 5: Go live (the recommended order)
- Start AutoDJ (optional pre-roll) so the station is never silent
- Connect your live encoder to Shoutcast Net and confirm audio is live
- Start OBS and begin restream to Twitch + Facebook
- Post your Shoutcast stream link on both platforms for listeners who want audio-only
Step 6: Keep a quick troubleshooting checklist
If something goes wrong mid-set, use this fast list:
- No audio on Twitch/Facebook: check OBS audio input source and mute states
- Encoder disconnected: verify password/port and check firewall; enable reconnect
- Audio distortion: reduce gain, disable enhancements, confirm sample rate
- Video stutter: lower output bitrate/resolution and close CPU-heavy apps
- Dead air risk: confirm AutoDJ failover is active
Pro Tip
Treat Shoutcast Net as your broadcast “transmitter” and social platforms as marketing channels. You’ll grow faster when your core stream is stable, shareable, and not tied to unpredictable costs. With Shoutcast Net, you get the flat-rate unlimited model, SSL streaming, and reliable uptime—without being boxed in by legacy Shoutcast limitations.
Ready to stream your next DJ set?
You can launch a professional setup today: stable Shoutcast audio, social discovery on Twitch and Facebook, and AutoDJ for 24/7 continuity. If you want to expand later, the same foundation supports broader workflows, including any stream protocols to any stream protocols (RTMP, RTSP, WebRTC, SRT, etc), and additional destinations so you can Restream to Facebook, Twitch, YouTube as your audience grows.
Quick recap
- Create server: Shoutcast Net + SSL + unlimited listeners
- Encode audio: stable bitrate, reconnect enabled
- OBS + restream: Twitch + Facebook simultaneously
- Failover: AutoDJ keeps you live when you disconnect
- Monitor: test on multiple devices, aim for consistent latency (even very low latency 3 sec when supported)