Complete School Radio Station Setup Guide (2026 Edition): From Studio to Live Stream
A modern school radio station can be a daily campus soundtrack, a journalism lab, a sports broadcast hub, and a skills pipeline into audio, media, and IT careers. This guide walks you through a reliable, budget-aware setup that sounds professional in the studio and stays stable online—whether you’re running student DJs, podcasts, chapel services, live events, or a full 24/7 stream.
We’ll cover planning, studio gear, room + network reliability, choosing a streaming host, encoder settings, AutoDJ programming, and launch/monitoring. Along the way, we’ll show how to avoid platforms with expensive per-hour/per-viewer pricing (a common issue with Wowza-style billing) and why a flat-rate host matters for schools.
Quick checklist (what you’ll build)
- A simple studio audio chain (mic → mixer/interface → encoder)
- A reliable room + network setup with fallback options
- A school-safe streaming plan with predictable pricing
- 24/7 programming via AutoDJ when students are off-air
- Monitoring + promotion so listeners can always tune in
Table of contents
- Step 1: Define your format, roles, and broadcast schedule
- Step 2: Choose essential studio gear (mics, mixer, headphones)
- Step 3: Set up your room, internet connection, and reliability checklist
- Step 4: Pick a streaming host (avoid per-viewer pricing)
- Step 5: Configure your encoder (bitrate, codec, metadata)
- Step 6: Add AutoDJ playlists for 24/7 programming and failover
- Step 7: Launch, promote, and monitor uptime and listener access
Step 1: Define your format, roles, and broadcast schedule
Before you buy gear or pick a streaming host, lock down what the station is for. Schools often try to do everything at once (music + announcements + sports + podcasts). You can absolutely do that—but only if you define clear formats, responsibilities, and an easy schedule students can follow.
Action: Write a one-page station plan
Create a one-page document that everyone can understand: administrators, teachers, IT staff, and students. Keep it simple and practical.
- Station format: Top 40, clean hits, indie, talk, sports, chapel/church broadcasts, school news, podcast blocks, or a mix.
- Audience: students on campus, parents off campus, alumni, community.
- Content rules: language policy, music suitability, sponsor/PSA guidelines, naming conventions.
- Operating hours: live shows during lunch and after school + automated nights/weekends.
- Success metrics: consistent schedule, clean audio, reliable stream, participation goals.
Action: Assign roles (and backups)
A school station works best when it’s not dependent on one “audio kid” or one teacher. Assign roles with backups so the station can run even when people are absent.
- Station manager (teacher/staff): approves schedule, policies, and final decisions.
- Technical lead (IT + student): network, streaming dashboard, credentials, failover.
- Programming lead: playlists, rotation rules, clean edits, show formats.
- On-air talent: DJs, hosts, interviewers.
- Production team: IDs, promos, podcast edits, short-form clips.
Action: Build a schedule that matches real school life
Aim for consistency first. A station that streams reliably every day (even with automated content) builds trust faster than a station that goes live randomly.
- Daily “tentpoles”: morning announcements, lunch mix, after-school sports recap.
- Weekly shows: student spotlight, music discovery, debate/talk, campus sports preview.
- Event blocks: pep rallies, graduation, theater streams, church services.
- Off-hours: automated music + station IDs + replays.
Pro Tip
Write “what happens if no one shows up” into the plan. If you use AutoDJ as a fallback, your station stays on-air and your audience learns to rely on you—even during exams, holidays, or snow days.
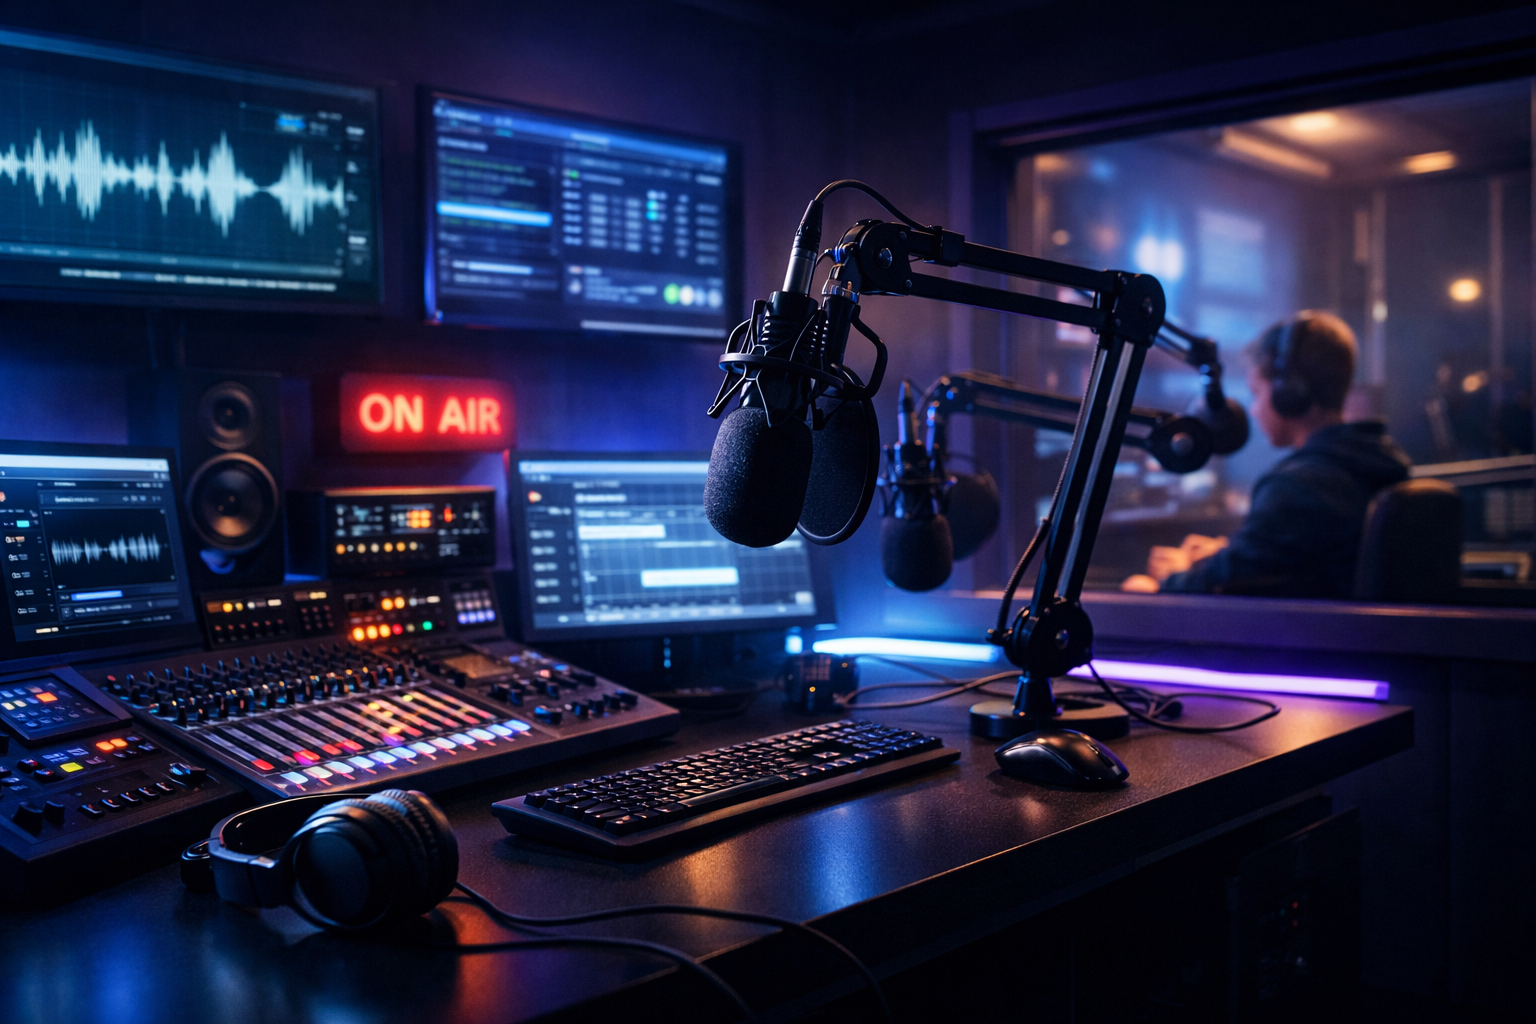
Step 2: Choose essential studio gear (mics, mixer, headphones)
Your goal is a clean, controllable audio chain that students can operate safely and consistently. You do not need a “big radio console” to sound professional—what matters is gain staging, mic technique, and avoiding noise.
Action: Decide your core audio chain
Most school studios should choose one of these two proven setups:
| Setup | Best for | Pros | Watch-outs |
|---|---|---|---|
| USB dynamic mic(s) → computer encoder | Small budget, simple student training | Fast setup, fewer cables | Limited routing, harder multi-mic control |
| XLR dynamic mic(s) → mixer/audio interface → computer encoder | Multi-host shows, interviews, music + mic mixing | Better control, cleaner workflow, scalable | More parts (needs setup + labeling) |
Action: Pick microphones that forgive beginners
For schools, dynamic microphones are usually the right choice: they reduce room noise, handle loud voices, and survive student handling better than sensitive condensers.
- Recommended type: dynamic cardioid (rejects sound from behind)
- Must-have accessories: boom arm, pop filter/windscreen, shock mount (optional but helpful)
- Number to start: 2 mics for co-hosting; 4 mics if you plan panels/interviews
Action: Choose a mixer/interface that matches your show style
If your station mixes microphones, music beds, phone calls, and remote guests, a mixer is worth it. If you mainly record podcasts with two mics, an interface can be simpler.
- Minimum features: enough mic preamps, headphone output(s), clean meters, mute buttons
- Nice-to-have: per-channel EQ, compressor/limiter, USB audio to the computer
- Student-proofing: label channels (Mic 1, Mic 2, Music PC, Phone), tape “safe zones” on faders
Action: Get the right headphones (and control volume)
Closed-back headphones prevent mic bleed and help students hear levels clearly. Add a headphone amplifier if you need multiple outputs.
- Closed-back headphones: helps voice clarity and reduces feedback risks
- Spare set: always keep one backup pair in the studio
- Hearing safety: set max headphone amp level and teach students to start low
Action: Add simple processing for consistent loudness
You don’t need to crush your audio, but you do want consistent volume between students and music. A light compressor/limiter (hardware or software) helps prevent sudden peaks.
- Goal: voice stays present, no clipping, no huge loud/quiet swings
- Rule: fix mic technique first, then use processing
Pro Tip
Build the studio like a classroom: label everything, keep a one-page “How to go live” sheet at the desk, and store spare cables. You’ll get better shows faster than chasing “fancy” gear. If you need reliable basics, start with proven options from the shop.
Step 3: Set up your room, internet connection, and reliability checklist
A school station fails more often from room acoustics and network instability than from microphones. Fix the basics: reduce echo, harden your internet path, and plan for what happens when Wi‑Fi or a laptop dies mid-show.
Action: Treat the room (without major construction)
You’re fighting echo and background noise. Start with changes that cost little and make a big difference.
- Soft surfaces: curtains, rugs, fabric wall panels, bookcases
- Mic placement: keep mics close to mouths (2–4 inches) to reduce room sound
- Quiet zone: keep the studio away from loud hallways, HVAC, or cafeterias if possible
- On-air sign: simple but effective—reduces door slams and chatter
Action: Use wired internet for the encoder computer
Wi‑Fi is fine for browsing, but live audio streaming should be on Ethernet whenever possible. The goal is consistent upload with low packet loss.
- Ethernet to router/switch: avoid Wi‑Fi drops during peak campus usage
- QoS (Quality of Service): ask IT to prioritize the encoder device
- VLAN/firewall rules: allow outbound streaming ports required by your host
- Backup internet: a dedicated LTE/5G hotspot can save game-day streams
Action: Run a reliability checklist before going live
Make reliability a routine. Use a printed checklist next to the mixer so any student can verify readiness in 60 seconds.
- Power: mixer/interface and encoder computer on a UPS (battery backup)
- Audio: no red clipping lights; mic gains set; headphones tested
- Network: Ethernet connected; speed test upload stable; no VPN enabled
- Failover: AutoDJ enabled on host; emergency playlist ready
- Monitoring: one device listening externally (phone on cellular) to confirm stream is public
Action: Plan for remote broadcasts and events
Sports, graduations, and live events have different requirements than the studio. If you plan to stream from gyms or fields, map the signal path in advance and test the venue’s upload.
- Portable kit: 2 dynamic mics, small mixer, closed-back headphones, cables, power strips
- Connectivity: Ethernet if available; otherwise a bonded/backup cellular option
- Latency target: if you want near real-time interaction, aim for very low latency 3 sec where supported
Pro Tip
Schools often share bandwidth with testing labs and security cameras. Ask IT for a dedicated wired drop and a simple “streaming exception” rule set. The best studio gear won’t matter if your encoder can’t maintain a stable upload.
Step 4: Pick a streaming host (avoid per-viewer pricing)
Your streaming host is the bridge between your school and every listener. Choose a platform that matches education budgets: predictable cost, reliable uptime, and enough capacity for big audience moments (pep rallies, tournament runs, graduation).
Action: Avoid per-hour/per-viewer billing traps
Many “enterprise video” platforms (and some legacy streaming stacks) charge by the hour, by bandwidth, or even per-viewer. That’s the opposite of what schools need—your biggest moments are exactly when costs spike. Wowza-style models can become expensive fast when you scale events, add multiple renditions, or run long broadcasts.
A school station is best served by a flat-rate unlimited model where you can grow audience without worrying about surprise invoices.
Action: Choose a host built for audio broadcasting and modern distribution
Shoutcast Net is designed to keep stations online with predictable pricing and broadcaster-friendly tools. You can start at $4/month, get a 7-day free trial (your 7 days trial), and scale with features that matter to schools:
- Unlimited listeners (no per-viewer surprise billing)
- 99.9% uptime for reliability
- SSL streaming for secure listening on modern browsers
- AutoDJ support for 24/7 programming
- Compatible workflows that help you stream from any device to any device
Action: Decide between SHOUTcast vs Icecast compatibility
Some schools need SHOUTcast for broad player compatibility, directories, and classic radio workflows. Others prefer Icecast for certain open-source ecosystems. Shoutcast Net supports both options depending on your needs.
- For SHOUTcast plans: visit shoutcast hosting
- For Icecast plans: visit icecast
Action: Plan for multi-platform distribution
Schools increasingly want audio plus video or simulcast distribution for big events. Build a host/encoder workflow that can also Restream to Facebook, Twitch, YouTube when needed, without rebuilding your entire chain each time.
If you run hybrid events, look for support and guidance that can bridge any stream protocols to any stream protocols (RTMP, RTSP, WebRTC, SRT, etc) so you’re not locked into one platform or one device type.
Pro Tip
For schools, predictable billing beats “enterprise flexibility.” A flat-rate plan with unlimited listeners lets you promote aggressively without fearing a per-viewer bill—especially during graduation and playoffs. Start with the 7 days trial to test your studio, network, and student workflow end-to-end.
Step 5: Configure your encoder (bitrate, codec, metadata)
The encoder is the software (or hardware) that takes your live audio and sends it to your streaming server. Correct settings mean fewer dropouts, better sound on phones, and consistent metadata (song titles, show names) for listeners.
Action: Choose an encoder app that your team can run
Pick something you can train in one class period and document on a single page. Many schools use a dedicated “encoder computer” that doesn’t change often—stability matters more than fancy features.
- Best practice: one dedicated encoder profile per show (Lunch Mix, Sports, Chapel, Podcast Live)
- Access control: store credentials in a secure password manager controlled by staff
- Audio inputs: verify the correct interface/mixer input is selected
Action: Set bitrate and codec based on real listening
Most school audiences listen on phones, school Chromebooks, and car stereos. Choose settings that sound good while staying stable on variable networks.
- AAC/AAC+: efficient, good quality at lower bitrates (great for mobile)
- MP3: widely compatible, slightly less efficient
- Suggested starting point: 64–96 kbps AAC+ for talk/music blend; 128 kbps for music-heavy if bandwidth is strong
- Sample rate: 44.1 kHz is a safe standard
Action: Configure stream connection details
Your host provides: server address, port, mount/stream name, and password. Keep these in a secured staff document and only share “operator steps” with students.
# Example encoder profile (generic)
Server Type: SHOUTcast or Icecast
Host: your-stream-hostname.example.com
Port: 8000
Password: (provided by your host)
Mount/Stream Name: /live  (Icecast)  OR Stream ID: 1 (SHOUTcast v2-style)

Audio Codec: AAC+ (or MP3)
Bitrate: 96 kbps
Sample Rate: 44.1 kHz
Channels: Stereo (or Mono for talk-only)
Reconnect: Enabled (5–10 seconds)
Metadata (Now Playing): Enabled
Action: Turn on metadata and station branding
Metadata makes your station feel real. “Now playing” data improves listener trust and helps students learn professional workflow. Standardize how titles appear.
- Format: Artist - Title (avoid ALL CAPS)
- Show names: “Falcon Radio Lunch Mix” vs “Live”
- Station IDs: rotate recorded IDs every 10–15 minutes (especially if music-heavy)
Action: Validate your stream externally
Always test from outside the school network: a phone on cellular data, a home laptop, and at least one smart speaker or car connection if possible. This confirms your station truly can stream from any device to any device.
Pro Tip
Create two encoder profiles: one “Main Live” and one “Emergency Low Bitrate.” If the school network gets congested, switching to a lower bitrate can keep audio on-air while you troubleshoot—without ending the broadcast.
Step 6: Add AutoDJ playlists for 24/7 programming and failover
A “school radio station” shouldn’t go silent at 3:05 PM. The simplest way to sound established is to run a 24/7 stream using AutoDJ when students aren’t live—and to use AutoDJ as an automatic fallback if the encoder disconnects.
Action: Build your programming blocks
Think like a real station: rotations, IDs, and time-of-day energy. Keep it clean and age-appropriate. A good baseline is 3–5 playlists.
- Current clean hits: student-friendly mainstream
- Throwbacks: staff-approved classics
- Instrumental/lofi: study-friendly blocks for library hours
- Station IDs + promos: short sweepers, club promos, event reminders
- Sports/announcements replays: edited highlights and short updates
Action: Upload tracks and schedule rotations
Once your plan is set, upload your audio library and define how often each category plays. Many schools keep it simple: rotate IDs every 10–15 minutes and promos every 20–30 minutes.
If you’re using Shoutcast Net, you can enable AutoDJ to power these rotations without leaving a studio computer running all night.
Action: Configure fallback so dead air never happens
This is where a lot of school stations level up. If the live encoder disconnects (power outage, student closes the app, Wi‑Fi drops), AutoDJ should automatically take over. That way listeners keep hearing programming instead of silence.
# Fallback logic (concept)
If Live Source Connected:
  Play Live Audio
Else:
  Play AutoDJ Playlist (IDs + Music + Promos)
Action: Prepare “event mode” playlists
For sports and live events, create an “event mode” set: hype music, sponsor reads (if allowed), and short station imaging. If you’re also doing video, keep a parallel plan to Restream to Facebook, Twitch, YouTube while your core audio station remains stable.
Pro Tip
AutoDJ turns your station into a real service instead of a club that meets twice a week. It also protects your reputation: listeners forgive rough segments, but they don’t forgive silence. Enable AutoDJ early and treat it as your safety net.
Step 7: Launch, promote, and monitor uptime and listener access
A successful launch is more than pressing “Start streaming.” You need a clean public listening path, a promotion plan that fits your school’s rules, and monitoring so you can catch issues before students (or parents) do.
Action: Create a “listen now” path that works everywhere
Make it easy for listeners: one link, clear instructions, and compatibility across phones, laptops, and smart devices. The goal is a station that can truly stream from any device to any device.
- School website embed: a simple player on the homepage or media page
- Short URL / QR code: posters in hallways and at games
- Backup link: a direct stream URL in case embeds are blocked on campus devices
- SSL streaming: prevents “mixed content” issues in browsers
Action: Promote with a repeatable weekly rhythm
Promotion is easiest when it’s built into school life. Keep it consistent, student-led, and approved.
- Morning announcements: mention the day’s shows
- Clubs + athletics: partner on coverage and shoutouts
- Social media clips: 15–30 second highlights with captions
- Newsletter: monthly “best of” links and schedule
Action: Monitor uptime, quality, and access
Monitoring is how you protect your station’s credibility. Schools should measure three things: (1) is the stream up, (2) does it sound clean, and (3) can real listeners access it from outside campus.
- Uptime target: choose a host with 99.9% uptime
- Quality checks: weekly listening tests on phone + Chromebook + car (if possible)
- Logbook: students note issues and fixes after each show
- Latency planning: for interactive shows, aim for very low latency 3 sec where supported and appropriate
Action: Keep costs predictable as you grow
As your station becomes popular, you don’t want a billing model that punishes success. This is where flat-rate hosting matters. Unlike Wowza’s expensive per-hour/per-viewer billing, Shoutcast Net is built around predictable plans—starting at $4/month—so you can scale promotion and special events confidently.
If you haven’t chosen your host yet, start here: shoutcast hosting or try it first with the 7 days trial. If your workflow relies on automated programming, add AutoDJ.
Action: Future-proof for multi-protocol streaming needs
Even if your station is audio-first, future events may require remote guests, video, or cross-platform distribution. Plan workflows that can adapt to any stream protocols to any stream protocols (RTMP, RTSP, WebRTC, SRT, etc) so you can add capabilities without replacing everything.
Pro Tip
Do a “launch rehearsal week” before announcing publicly: run AutoDJ overnight, schedule two live shows, and test from outside networks daily. Fix issues quietly first—then promote hard when the station is already stable.
Recommended next step
If you want predictable school-friendly pricing and broadcaster tools (SSL streaming, unlimited listeners, AutoDJ, and reliable uptime), start with Shoutcast Net and validate your setup end-to-end.
Common school station “gotchas”
- Streaming over Wi‑Fi instead of Ethernet (random drops)
- No fallback content (dead air when the encoder stops)
- Unlabeled mixer channels (students change the wrong knob)
- No external monitoring (it “works” only inside campus)
- Choosing per-viewer/per-hour pricing (cost spikes during big events)